


Building your first bike from the ground up can be an exhilarating experience that not only enhances your cycling skills but also deepens your understanding of the mechanics involved. This journey requires careful planning, a clear vision of your desired outcome, and knowledge of the various components that come together to create a fully functional bicycle. This guide aims to provide a comprehensive roadmap to help you navigate the complexities of your first bike build.
Before you dive into purchasing parts and assembling your bike, it is essential to establish a firm foundation by selecting the right type of bike for your needs. Whether you are aiming for a road, mountain, or hybrid bike, understanding the purpose and performance characteristics of each type will guide your choices throughout the build. Researching the components and compatibility is crucial to ensure that your bike will meet your riding style and functional requirements.
As you embark on this project, it’s vital to set a budget that accommodates all necessary components while allowing for some flexibility in case of unexpected costs. Quality components will enhance your riding experience and overall safety, so consider investing in reputable brands. This guide will walk you through the essential components, tools necessary for assembly, and tips on putting everything together seamlessly, ensuring that your bike is not just a collection of parts but a reliable machine ready to hit the road or trail.
Choosing the Right Components for Your Bike
Selecting the right components is crucial for creating a bike that suits your riding style, preferences, and terrain. Start with the frame, which should match your intended use, whether it’s for road cycling, mountain biking, or touring. Consider materials like aluminum for a lightweight ride or steel for durability and comfort.
Next, focus on the suspension system, essential for mountain bikes. Choose between hardtail (front suspension only) and full suspension (both front and rear) depending on the type of trails you’ll encounter. Hardtails are lighter and more efficient on smooth surfaces, while full suspensions provide better control on rough terrain.
When it comes to wheels, think about the diameter and material. 29-inch wheels roll over obstacles better, making them ideal for rough trails. Conversely, 26-inch wheels offer better acceleration and maneuverability. Ensure that the rims are compatible with your tire choice and riding style.
The drivetrain is another critical component. Decide between a single chainring setup for simplicity and lighter weight, or a multi-chainring system for versatility in gear selection. Be mindful of the number of gears, as more options can enhance your ability to tackle various inclines.
Brakes have a significant impact on safety and performance. Choose between rim brakes, which are lighter and easier to maintain, or disc brakes, which offer better stopping power in all conditions. Hydraulic disc brakes, while more expensive, provide superior modulation and performance.
Finally, select the cockpit components, including the handlebars, stem, and saddle. Experiment with different handlebar widths and shapes to find what feels comfortable for your riding style. Ensure the saddle fits you well, as this can make a substantial difference in riding comfort over long distances.
By carefully considering each of these components, you can ensure that your bike meets your needs and enhances your riding experience. Take the time to research and select parts that will work harmoniously together for a complete build that you will enjoy for years to come.
Understanding Tools and Workspace Essentials
When planning your first complete bike build, having the right tools and a well-organized workspace is essential for success. This not only improves efficiency but also ensures accuracy and safety during the assembly process.
Start with a good set of hand tools. Essential items include a torque wrench, adjustable wrenches, Allen keys (both metric and imperial), screwdrivers, and pliers. A torque wrench is critical to prevent overtightening and damaging components. It is advisable to invest in high-quality tools that will last and function properly.
A bike-specific tool kit can be a convenient option, as these kits typically include specialized tools such as chain breakers, tire levers, and wheel truing stands. Having these tools will simplify maintenance tasks and adjustments throughout the build.
Regarding workspace, select a clean, spacious area with adequate lighting. A sturdy workbench or table is ideal for assembling the bike. Ensure that you have enough room to spread out components and tools without cluttering your workspace. Keeping your area organized can prevent misplacing small parts, which is vital during any assembly project.
Consider using a bike stand to support the frame while you work. This allows easier access to all parts of the bike and makes adjustments more straightforward. If a bike stand is unavailable, a hanging solution can also work, but ensure the bike is stable and secure.
Staying organized is key; use small containers or magnetic trays to keep bolts, screws, and other small components separate. Labeling these containers can help you locate items quickly when needed.
Finally, ensure the workspace is well-ventilated and free of distractions. This focus will help you concentrate on the build, making it a more enjoyable and successful experience.
Step-by-Step Assembly Process and Tips
Assembling your first complete bike can be a rewarding experience. Follow these steps to ensure a smooth assembly process.
1. Prepare Your Workspace: Choose a clean, well-lit area with ample space to work. Gather all necessary tools such as wrenches, screwdrivers, and tire levers, along with the bike frame and components. An organized workspace reduces the risk of losing small parts.
2. Install the Bottom Bracket: Start by inserting the bottom bracket into the bike frame. Apply grease to the threads for easier installation and to prevent rust. Use the appropriate tool to secure it in place, ensuring it is tightly fitted but not over-tightened.
3. Attach the Fork: Slide the fork into the head tube and secure it with the headset. Make sure to properly adjust the bearing preload to ensure smooth steering. Insert the stem and tighten the top cap to secure everything in place.
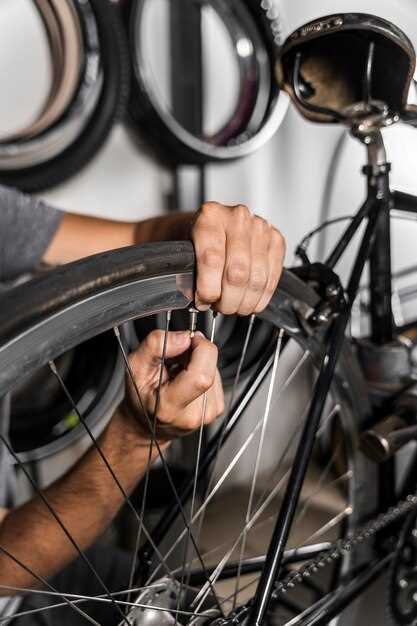
4. Install the Wheelset: Fit the front wheel into the fork dropouts and secure it with quick-release or thru-axle mechanisms as appropriate. Repeat the process for the rear wheel, ensuring that the cassette is properly aligned with the derailleur.
5. Attach the Brakes: Install the brake calipers onto the frame and fork. For rim brakes, ensure the pads are aligned with the rim surface. For disc brakes, make sure the rotors and calipers are aligned correctly. Adjust and fine-tune the brakes for optimal performance.
6. Install the Drivetrain: Attach the crankset and chainrings to the bottom bracket. Install the front derailleur followed by the rear derailleur, ensuring correct alignment with the sprockets. Thread the chain through both derailleurs, ensuring it is properly seated on each sprocket.
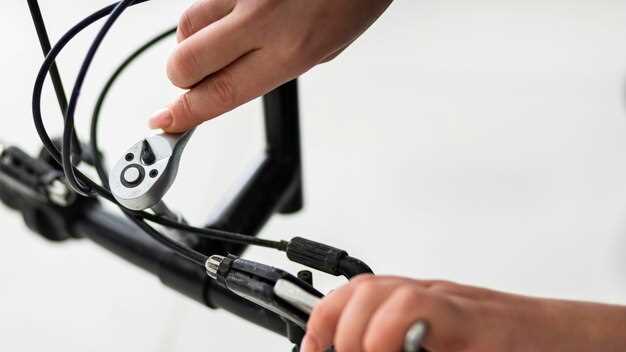
7. Handlebar and Shifters: Secure the handlebars into the stem and align them with the wheel. Install the shifters and brake levers, ensuring they are in comfortable positions for operation. Route the cables neatly along the frame, using cable guides as required.
8. Adjustments and Fine-Tuning: After assembling, make initial adjustments to brakes and gears. Test shift through all gears and ensure smooth operation. Check brake responsiveness and make any necessary adjustments to the cable tension and alignment.
9. Inspect and Test: Conduct a thorough inspection of all connections and components. Make sure every bolt is correctly tightened. Take the bike for a short test ride to ensure everything functions well. Pay attention to any unusual sounds or behaviors during the ride.
10. Final Adjustments: After your test ride, make final adjustments based on your riding experience. Recheck the brakes, gears, and general fit of your bike to ensure it meets your comfort and performance standards.
By following these steps and taking your time, you’ll successfully assemble a bike that meets your needs. Always refer to manufacturer instructions for specific parts, as they may have particular requirements for installation.