


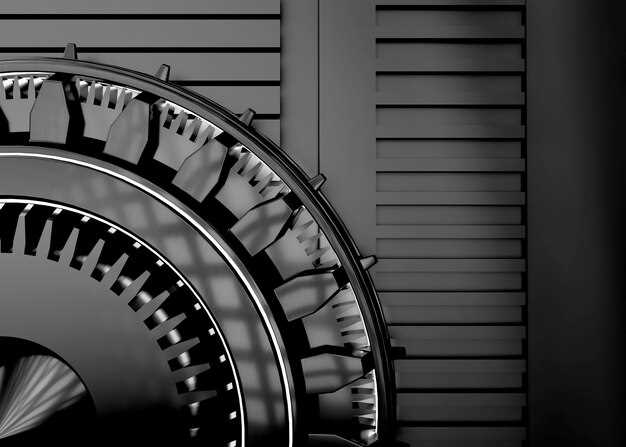
The art of engine rebuilding is a skill that demands precision, knowledge, and a deep understanding of automotive mechanics. In the fast-paced world of DIY automotive repair and restoration, enthusiasts often seek intensive training that delivers extensive hands-on experience within a short period. Our recent Engine Rebuild Masterclass accomplished precisely this, enabling participants to master vital techniques and develop a robust foundation in engine mechanics–all within a mere 48 hours.
Over the course of two days, attendees immersed themselves in a comprehensive curriculum that combined theoretical knowledge with practical application. Each participant had the opportunity to work on actual engines, disassembling and reassembling components, diagnosing issues, and learning best practices for ensuring optimal performance. This hands-on approach not only accelerated the learning process but also nurtured confidence among the participants as they navigated through complex tasks that often challenge even seasoned mechanics.
Throughout the masterclass, expert instructors shared their wealth of experience, providing valuable insights into the intricacies of engine design and function. Participants engaged in group discussions and demonstrations that highlighted key concepts such as torque specifications, timing mechanisms, and the significance of proper lubrication. As learners developed their skills in real-time, they also gained access to tools and techniques that are often overlooked in traditional courses, making this masterclass a pivotal experience for anyone looking to deepen their expertise in engine rebuilding.
Step-by-Step Process for Disassembling an Engine in Under 6 Hours
Disassembling an engine efficiently requires preparation, tools, and a systematic approach. Follow this detailed process to achieve successful engine disassembly within a six-hour timeframe.
1. Gather Necessary Tools and Equipment: Before starting, ensure you have all required tools. Essential items include a socket set, screwdrivers, pliers, a torque wrench, engine hoist, and containers for organizing small parts. Additionally, have shop manuals handy for reference.
2. Prepare Your Workspace: A clean and well-lit area is vital. Clear any obstructions and set up a workbench for organizing parts. Place an engine stand in proximity for easy access during disassembly.
3. Disconnect Batteries and Fluids: Safety is paramount. Begin by disconnecting the battery terminals to prevent electrical shorts. Drain all fluids, including oil and coolant, from the engine to avoid spills during disassembly.
4. Remove External Components: Start by taking off the air intake, exhaust manifold, and any accessories such as the alternator and power steering pump. Label all components and retain bolts in separate containers for easy reassembly.
5. Detach the Engine from the Vehicle: If the engine is still mounted in the vehicle, remove the engine mounts. Use an engine hoist to lift the engine slightly and carefully maneuver it out of the engine bay. Ensure there is ample room to work.
6. Remove the Intake and Timing Covers: Take off the intake manifold and timing cover. To do this, carefully detach any sensors, hoses, or wiring that may impede removal. Document the order of disassembly for reference.
7. Disassemble the Cylinder Head: Unbolt the cylinder head by following a specific sequence to prevent warping. Remove the head and place it safely aside. Take care to extract the head gasket and any accompanying seals.
8. Remove the Pistons and Crankshaft: Next, unbolt the connecting rods from the crankshaft. Slide the pistons out of the cylinders, keeping the components organized. Once the pistons are removed, unbolt and lift out the crankshaft with caution.
9. Inspect and Organize Parts: As you disassemble, continuously inspect each component for wear or damage. Place parts in labeled containers based on their assembly location. This organization simplifies the reassembly phase.
10. Clean and Prepare for Rebuild: After disassembly, clean all parts thoroughly. Remove old gasket material and inspect surfaces for flatness. Identify any parts requiring replacement or machining before proceeding with the rebuild.
By following these steps rigorously, you can effectively disassemble an engine in under six hours. Each phase requires attention to detail and organization to ensure a smooth rebuild process after disassembly.
Key Techniques for Replacing Engine Components Efficiently

Replacing engine components requires precision and systematic approaches to maximize efficiency and minimize downtime. One of the fundamental techniques is the use of an organized workspace. Labeling parts and using designated containers can significantly reduce the time spent searching for components during reassembly.
Another vital technique is to utilize high-quality tools. Investing in the right equipment, such as torque wrenches, impact sockets, and specialized engine tools, can streamline the removal and installation of parts, reducing the likelihood of damages and ensuring proper torque specifications.
Following a detailed service manual for the specific engine model is crucial. These manuals provide step-by-step instructions, torque values, and the sequence of disassembly and reassembly. Adhering to these guidelines helps avoid mistakes that could lead to engine malfunction.
Employing a systematic approach to replace components, often referred to as the “one-at-a-time method,” is essential. This technique involves completing the replacement of one component before moving on to the next, minimizing the risk of confusion and errors. Taking photographs at each stage can also aid in remembering the original layout of components.
Utilizing a clean and tidy environment throughout the process is often overlooked but plays a significant role in efficiency. Removing debris and ensuring tools are returned to their designated places keeps distractions to a minimum and fosters a productive working environment.
Finally, collaboration and communication among team members can enhance the efficiency of the rebuild process. Clear distribution of tasks based on each member’s strengths allows for a more coordinated effort, ensuring that every phase of the component replacement is tackled swiftly and effectively.
Final Assembly Tips to Ensure Optimal Engine Performance
The final assembly of an engine is a critical phase that can significantly influence its overall performance and reliability. To ensure that your engine functions optimally after rebuilding, consider the following tips:
1. Cleanliness is Crucial
Before the final assembly, ensure that all components are thoroughly cleaned. Use lint-free rags, cleaning solvents, and compressed air to remove any debris, dirt, or contaminants that could affect performance. A clean workspace also prevents unwanted particles from entering the engine during assembly.
2. Use Quality Gaskets and Seals
Invest in high-quality gaskets and seals that are specifically designed for your engine model. Proper installation of these components is essential to prevent leaks and ensure a tight seal. Follow manufacturer specifications for torque and alignment during installation.
3. Pay Attention to Torque Specs
Utilize a torque wrench to apply the correct torque to all fasteners. Refer to the engine’s service manual for specific torque specifications and sequences, especially for critical components like the cylinder head, main bearing caps, and oil pan. Accurate torque application prevents warping and ensures proper component alignment.
4. Inspect All Moving Parts
Before final assembly, carefully inspect all moving parts, including pistons, crankshaft, and camshaft. Look for wear, scoring, or damage. Replace any worn components to avoid future failures and maintain engine efficiency.
5. Lubricate Strategically
Before assembly, apply assembly lube on all moving contact points. This includes bearings, piston skirts, and cam lobes. Proper lubrication reduces friction during the initial start and ensures that engine components are protected at startup.
6. Double-Check Electrical Connections
Ensure that all electrical connections, sensors, and wiring are correctly installed and secured. Improper connections can lead to misfires, poor fuel economy, or complete engine failure. Never overlook the importance of electrical integrity in achieving optimal engine performance.
7. Perform a Final Inspection
Before closing the engine, perform a comprehensive inspection of all components, checking for proper seating, tightness, and alignment. Look for any signs of potential issues that could arise during operation.
8. Run a Break-In Procedure
Once the assembly is complete, adhere to a break-in procedure to ensure the engine seals and components settle properly. This process typically involves running the engine at varying RPMs and load levels, allowing oil to circulate, and facilitating a proper mating of new surfaces.
Implementing these tips during the final assembly of your engine rebuild sets the foundation for optimal performance, durability, and efficiency. Attention to detail and adherence to best practices can make a significant difference in the lifespan and reliability of the engine.